PhoneGap 3
I recently wanted to test an idea on an android device. To quickly write up a proof of concept I decided to use PhoneGap. I have used PhoneGap in the past but the current Version 3.1 (at the time of writing) is more mature than when I previously developed with it. I was prepared to walk through a few hurtles to get my development environment setup to use PhoneGap but was pleasantly surprised with the process.
Instead of the hassles of previous versions the install was pretty straight forward. However I found the documentation a bit challenging. Possibly because it was just 2 code boxes for install and usage on the PG site (PhoneGap Install). I decided to share my process for anyone wanting to use PhoneGap on a Windows 8 PC.
Install PhoneGap 3 on Windows 8
Software You will need to complete this install (NodeJS and ADK) 1. Because PhoneGap now utilizes NodeJs, you will need this on your system. Download and install Nodejs – It is a quick and easy install and will end up in your program files (I have Win8 x64 and the path is : C:\program files\nodejs) 2. Install the Android Developer Kit (ADK) – You can choose the location for this. In my case i used a folder called (c:\dev\android) 3. Install PhoneGap – Here is where I had a few challenges and hope to simplify the process for anyone.
The install page on PhoneGap has these two blocks of commands. I would like to explain these and help anyone troubleshoot them.
C:\> npm install -g phonegap
$ phonegap create my-app $ cd my-app $ phonegap run android
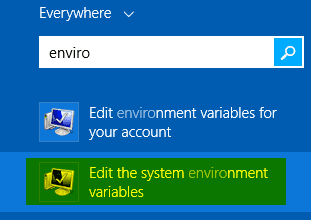
The npm command is the NodeJS Package Manager. It allows you to install packages with and to use with NodeJS. The command “npm install -g phonegap“. I believe that the “-g” just prints the folder (need to do a little more research) This will work if you have installed NodeJS and your enviornment variables are correct and windows accepts the npm (npm.exe) command. If you get an error, that does not recognize command  I would either first, restart your command windows (cmd.exe) to see if the path will restart or 2nd add the directory where NodeJS is located into your path environment. To add something to your path it is pretty easy to just do a search for “system environment” by using a WindowsKey + S.
  Once this opens you will have to look for the Environment Variables button and then add the path. I also had to run npm first from the node directory to get the npm command to work cd “c:\program files\nodejs” Then run “npm” This created a folder under my roaming profile During the install I had selected that NODE be added to my path, but it did not seem to work. In my case C:\Program Files\nodejs\ and I also had to add the location of NPM into this path file (this took me a bit to find this issue.
It was located in the roaming folder of the appdata. My location was “C:\Users\jimiz\AppData\Roaming\npm;”
C:\Users\yourusername\AppData\Roaming\npm;
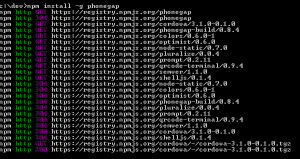
Once this is done you can now run the command “npm install -g phonegap” in a command window.
If everything works it will begin to download the PhoneGap package and install. It may take a bit based on your internet connection. here is what the screen looks like  After you have PhoneGap installed via npm you can now invoke the other commands. The next series from the PhoneGap site are:
ddd
$ phonegap create my-app $ cd my-app $ phonegap run android
ddd
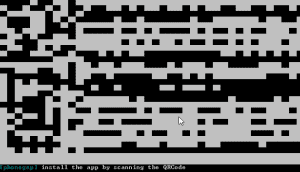
This code creates an app called “my-app” then moves into the directory “my-app” once there it runs the phonegap engine to create the android version of “my-app” Very cool results push you a QR code into the window. Mine looked very out of scale.
I hope that this tutorial helps anyone who had issues following the setup / install instructions on the PhoneGap site with Windows 8. Essentially it came down to the Path issue with NodeJS and the creation of the path for the npm command. Let me know if you see any issues or have any updates. I’ll post more on my PhoneGap application as I complete it.


Thanks for your help! I was stuck for a while until I followed your instructions.
Cheers,
Yuval